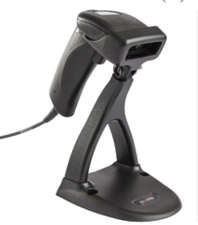

What’s in the box:
Imager scanner with attached serial cable.
Power supply.
Stand to be assembled.
In the shipping box:
Serial to USB adapter (blue).
1. Set up the scanner
a) Connect the nib of the power supply to the short cable connected to the scanner.
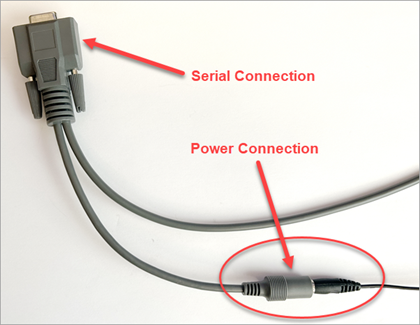
b) Connect the serial connector to the blue serial- to-USB (RS232) adapter.
c) Connect the blue adapter to a USB port on the back of the computer.
d) Connect the power supply to the wall or a power strip. The scanner will beep once.
2. Configure the scanner
The Code RS232 (Serial) Scanner must be configured to work correctly with Gym Assistant.
No drivers need to be installed.
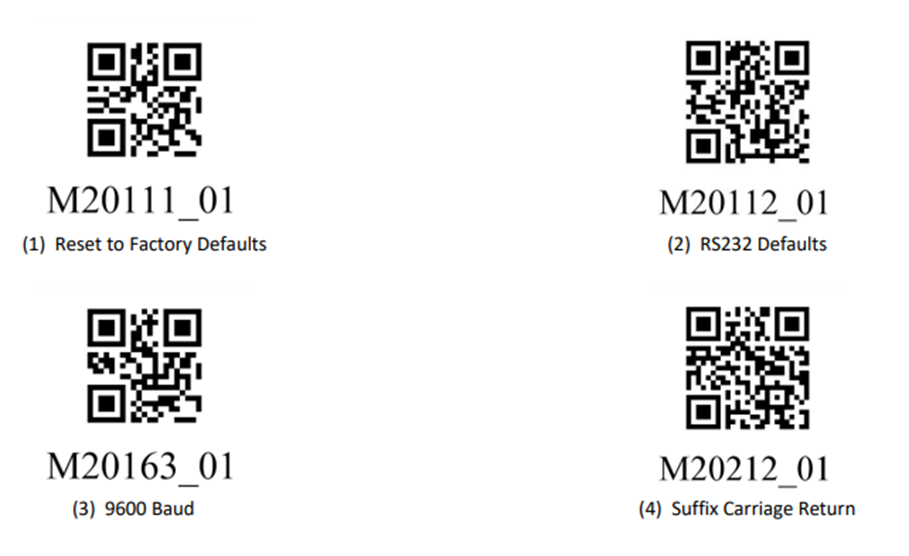
You can configure the scanner by scanning each one of the 2-D barcodes below in order from top left, top right, bottom left, bottom right.
- Press and hold the trigger as you aim to scan the small square of the first barcode on the top left.
- Once the scanner beeps release the trigger.
- Scan each of the remaining barcodes in order (top right, bottom left, bottom right), pausing for a few seconds between each one.
3. Set up GateKeeper.
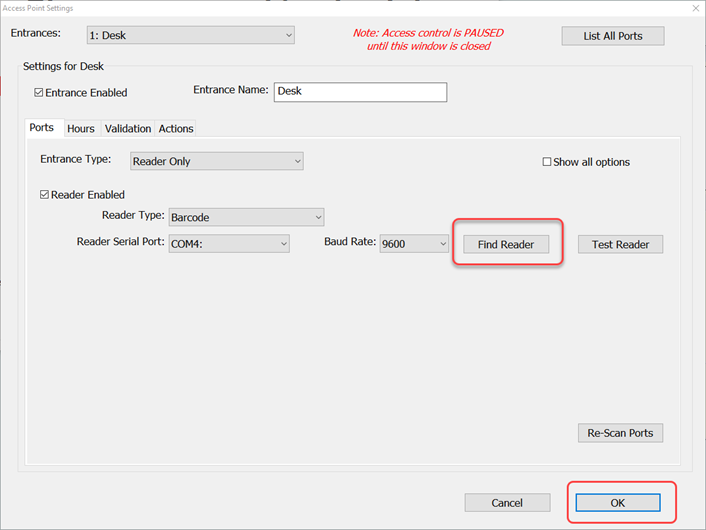
In GateKeeper click Settings/ Access Points /Ports.
For “entrance name” type in “Desk”, Entrance Type as “Reader Only”, and Reader Type as “Barcode”.
Click “Find Reader” and scan a keytag. It should indicate which port the scanner was found and will automatically fill the “Reader Serial Port”, click OK.
- With GateKeeper on the screen, scan the barcode of a keytag again.
- If the keytag is assigned to a member that member’s record will appear on GateKeeper and in Gym Assistant.
- If the keytag is not assigned to a member the barcode number will appear in GateKeeper but nothing will be pulled up in Gym Assistant.
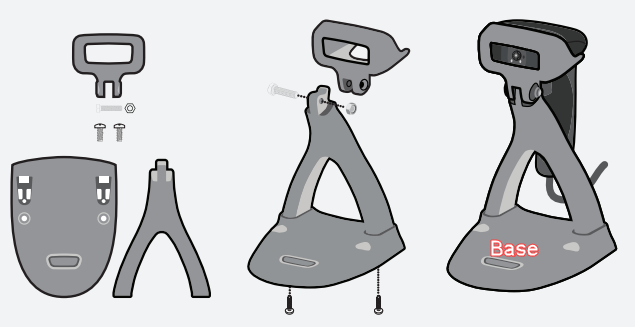
4. Assemble the stand
Follow the diagram below.
- Once assembled, position the base of the stand to face the members.
- Insert your scanner into the stand from behind the base with the screen facing the members.
- To scan, present the barcode side of the keytag to the face of the scanner. No need to press the trigger from now on.

Awesome! You are now ready to check in your members at the desk using the Imager Desk Scanner.
Should you need any help please contact our Support line at 877-496-2778 ext. 2 or email support@gymassistant.com.
Article ID: 43
Created: June 17, 2024
Last Updated: January 16, 2025
Author: Sarinah Tambu
Online URL: https://gymassistant.phpkb.cloud/article/imager-desktop-scanner-setup.html