How to Network Multiple Computers
Estimated Reading Time: 3 MinutesHow to Network Multiple Computers September 2024
Introduction
Networking capabilities with Gym Assistant allow you to share data from the host computer to multiple workstation computers.
Why network?
It provides you the convenience of having multiple workstations for conducting daily business.
You will begin the process by getting the host computer name and setting up the host computer:
- Double click on the file explorer icon.

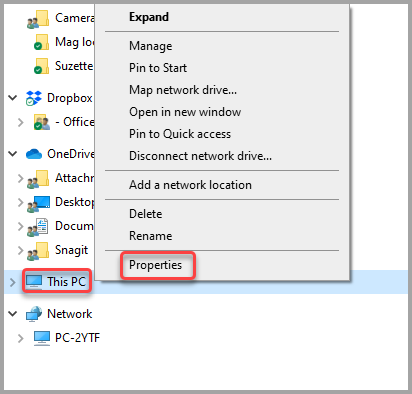
- Right click on This PC > left click on Properties.
- Copy the PC Device name and paste onto WB adding 2 backwards slashes in front of the PC name > close the window.
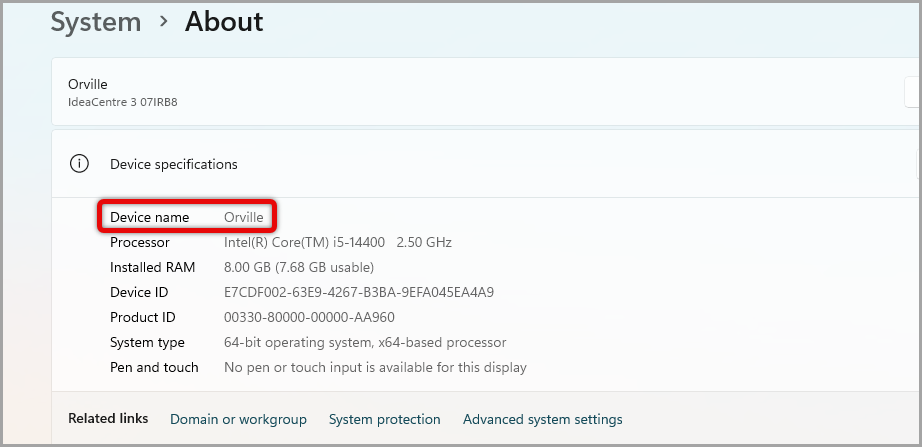
\\ORVILLE
- You will then be giving the ability to share the Gym Assistant folder by again double clicking on file explorer icon.

- Click on This PC > double click on Windows (C:).

- Double click on the Gym Assistant 2.6 folder.

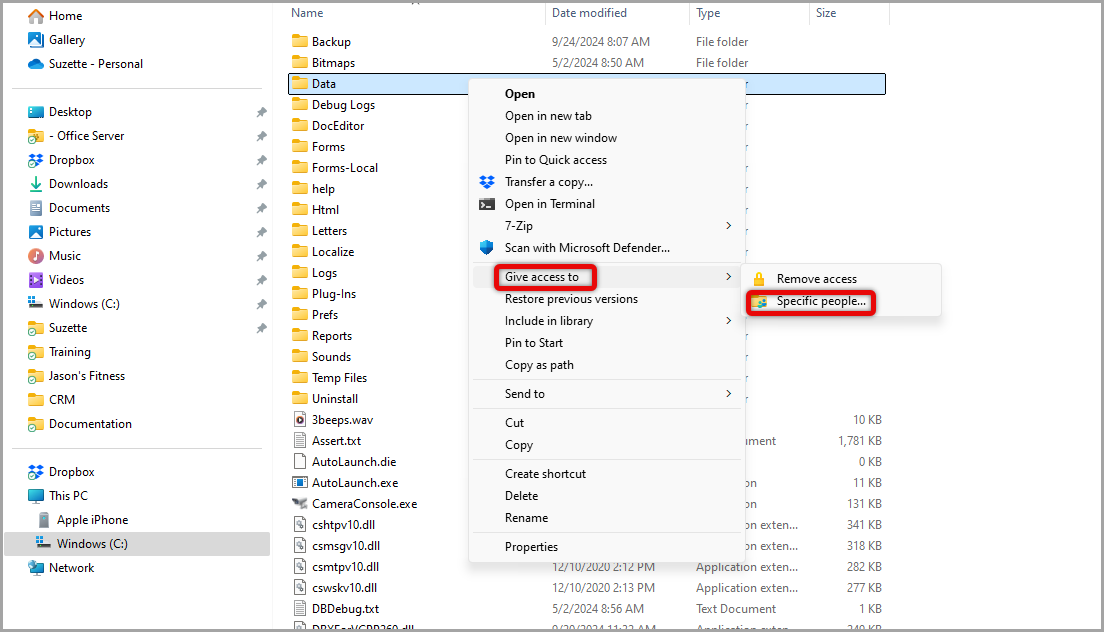
- Right click on the Data folder > click Show more options.

- Click Give access to > Specific people.
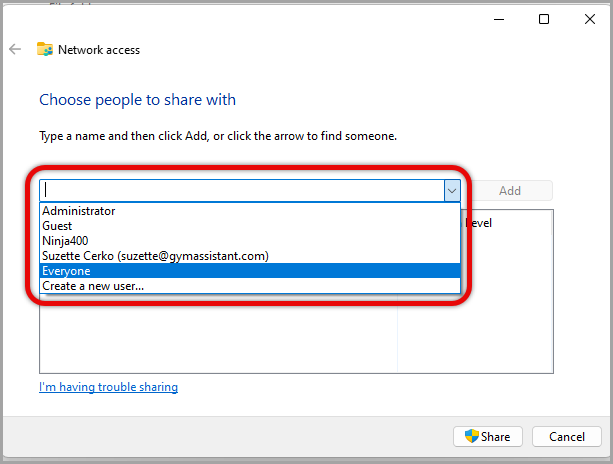
- Select Everyone in the drop down.
- Select Read/Write.
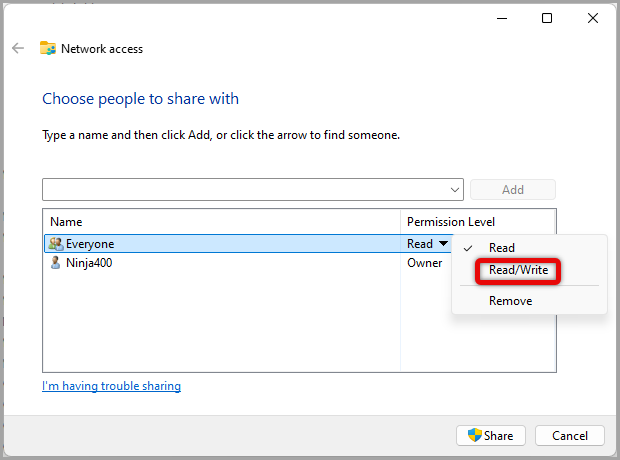
- Click Done making a note of the Gym Assistant path where the data will be found on the network. The path will include the name of the PC saved on your WB earlier, followed by another backward slash and the location of the data.

\\ORVILLE\Data
- You will then be changing network settings to allow sharing by clicking the internet settings icon on the lower right of the task bar > then clicking on the networking icon (properties if available).

- Click on the Network the computer is on.

- Check to make Private for network profile > click the Settings back arrow at top left.
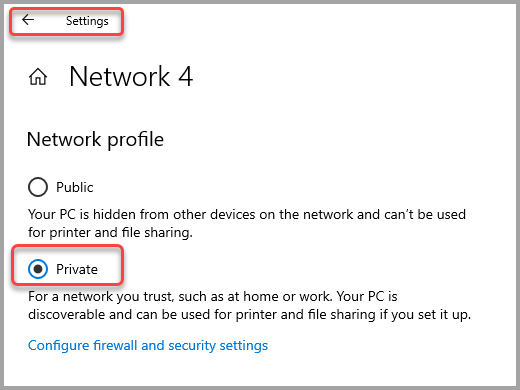
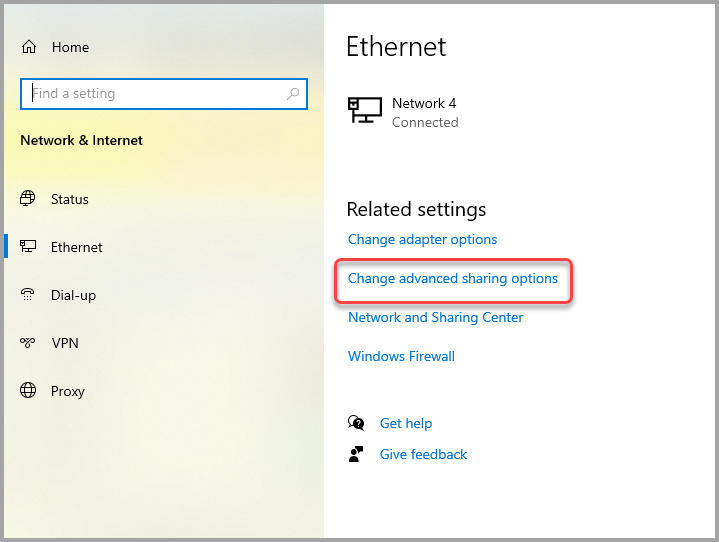
- Click on Change advanced sharing options.
- Click on down arrow for Private > Turn on network discovery > check the box Turn on automatic setup of network connected devices > Turn on file and printer sharing.

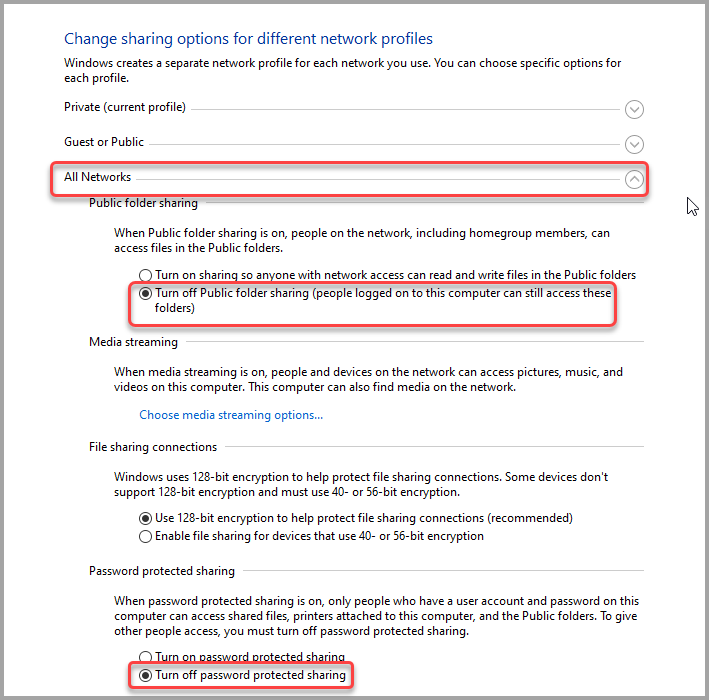
- Click the down arrow for All Networks > Turn off Public folder sharing > Turn off password protected sharing.
You will now be setting up networking on computer(s) being networked to this host computer.
- Begin by looking for Gym Assistant on the 2nd computer. If not located, install Gym Assistant and click Find an existing data file while installing Gym Assistant.

- Then click Browse to locate the data path on the network.
- If the window pops up asking to provide credentials, have them type them in. If they do not have them, try to use the word “guest” for username and click OK.
- If that is not successful, someone in the club with admin credentials will need to log in to proceed.

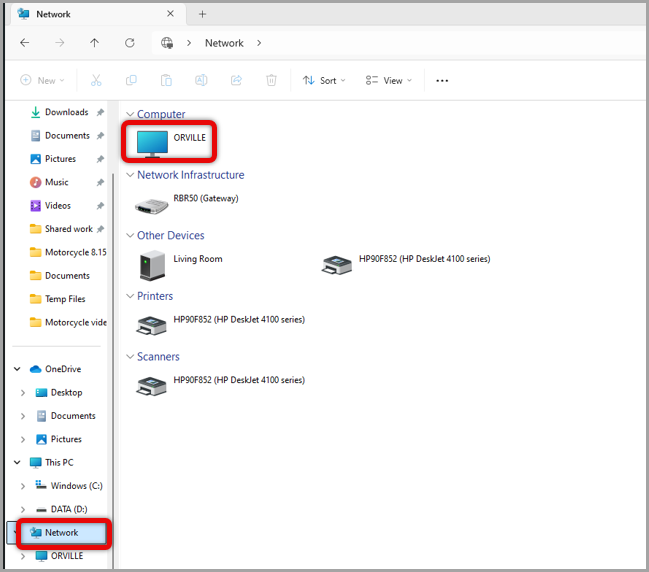
- Click on Network to the left > double click the computer name which will match the computer name located on the main computer.
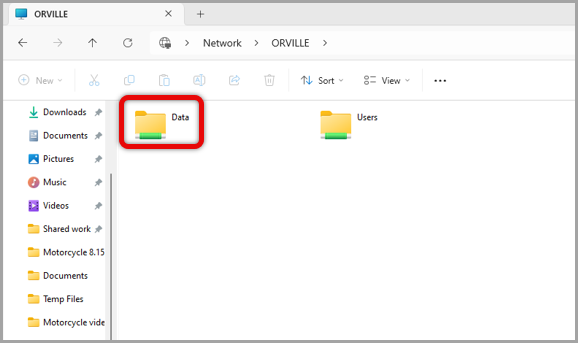
- Double click on the Data file shared on the network by the host computer.
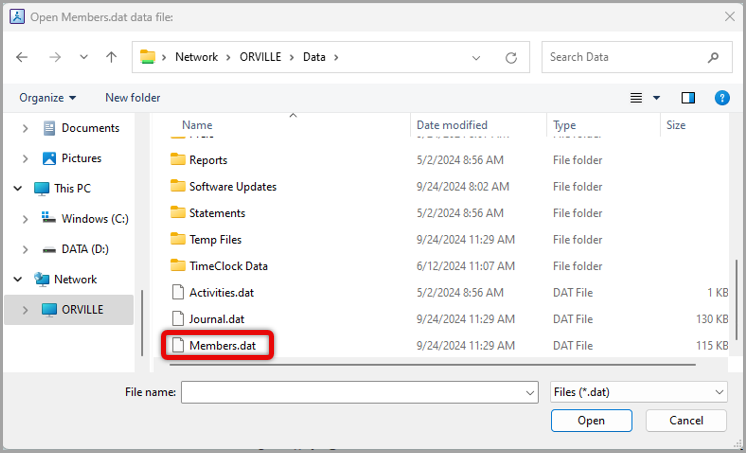
- Go double click on Members.dat.
- Click OK to set Data Path.

-
Click OK to restart Gym Assistant.

In the event you are unable to locate the other computer on the network, it may be necessary to change the advanced sharing settings for networking on this computer.
- Click the internet connection icon at the lower right > click where it indicates the network, or settings if available (represented by a toggle).
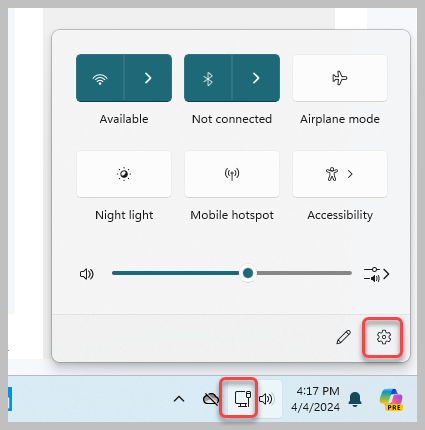
- Click on change Advanced sharing settings, or on Windows 11, first click on the internet connection > Advanced network settings > Advanced sharing settings.

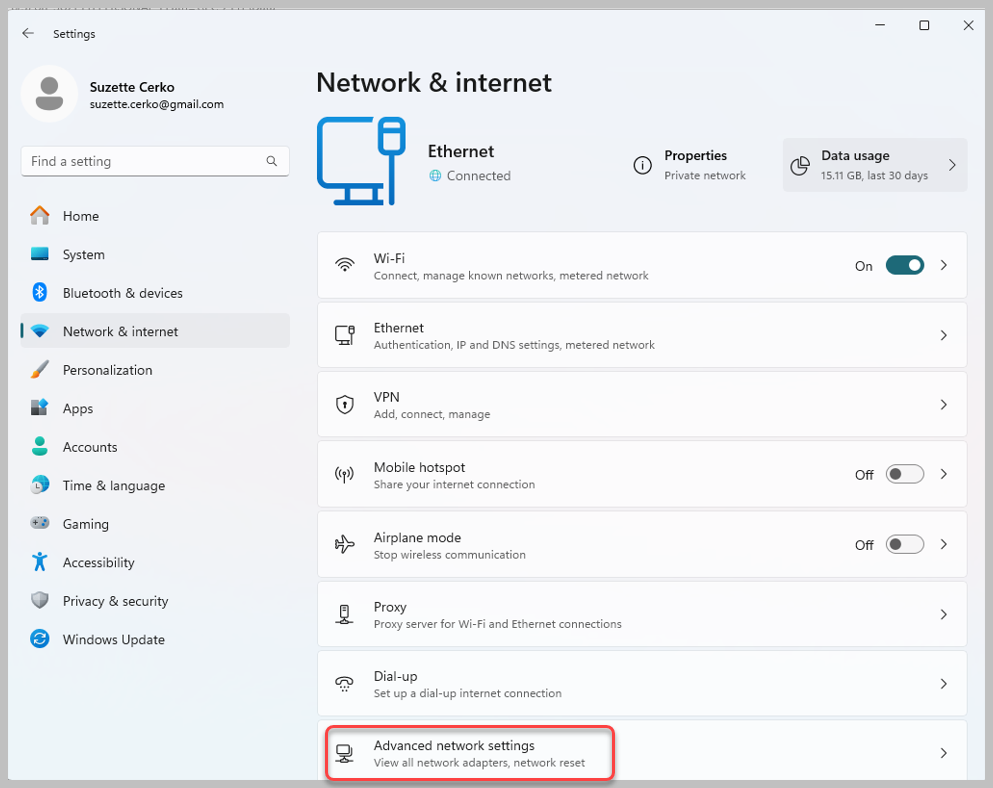

- All the way to the right of Private click the down arrow > Turn On Network discover.
- Check the box to Turn on automatically network connected devices.
- Turn File and printer sharing on.

- Click the arrow down to the far right of All networks and Turn off Public Folder sharing > Turn off password protected sharing.
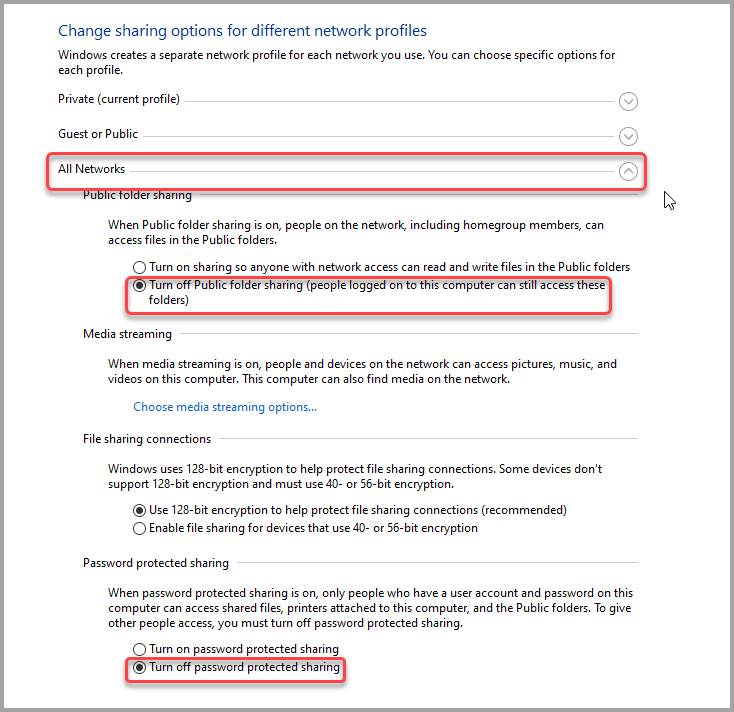
Once these settings have been updated, repeat the steps to locate the data to establish the connection as the settings have been changed to now allow.
Testing if COMMENT is a TICKET?